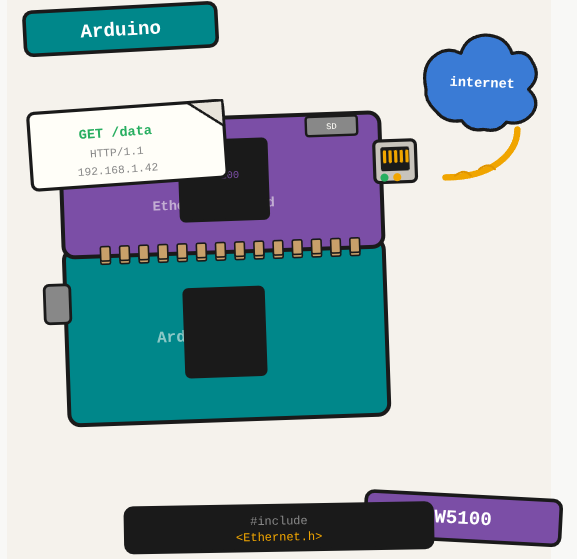
The Arduino Ethernet Shield turns your microcontroller into a network device. With it you can make HTTP requests, serve small web pages, or integrate Arduino sensor data into a larger system over the LAN.
TL;DR: Connect an Arduino Ethernet Shield to a network and make HTTP requests or serve data from a microcontroller.
Stack: Arduino, Ethernet Shield, W5100
Level: Beginner
Reading time: ~5 min
Overview
The Arduino Ethernet Shield is a component that lets Arduino communicate via HTTP. Note: it does not support HTTPS. For scenarios where HTTPS is required, you need to build an HTTP-to-HTTPS bridge using a separate server or proxy.
Connecting the shield
No separate wiring is needed: just stack the Ethernet Shield directly on top of the Arduino board and connect the RJ45 cable to your router or switch.
Code
#include <SPI.h>
#include <Ethernet.h>

byte mac[] = { 0x00, 0xAA, 0xBB, 0xCC, 0xDE, 0x02 };

void setup() {
    Serial.begin(9600);
    Serial.println("Device started");

    Serial.println("Connecting with DHCP...");
    if (Ethernet.begin(mac) == 0) {
        Serial.println("DHCP failed");
        if (Ethernet.hardwareStatus() == EthernetNoHardware) {
            Serial.println("Ethernet shield not found.");
        } else if (Ethernet.linkStatus() == LinkOFF) {
            Serial.println("Cable not connected.");
        }
        while (true) { delay(1); }
    }

    Serial.print("IP address: ");
    Serial.println(Ethernet.localIP());
}

void loop() {
    delay(3000);
    // make HTTP requests or handle incoming connections here
}
What you’ve built
An Arduino connected to the network via Ethernet Shield, with a DHCP-assigned IP, ready to make HTTP requests or serve data to the local network.
Next steps
- Use the WebServer library to serve a small JSON endpoint directly from the Arduino.
- Combine with a DHT11 sensor to publish temperature and humidity data over the network at regular intervals.
- For more capable networking, look into the ESP8266 or ESP32 which have built-in WiFi and more processing power.
Questions or feedback? Find me on LinkedIn or GitHub.